


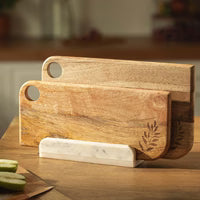


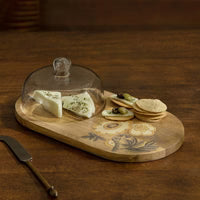


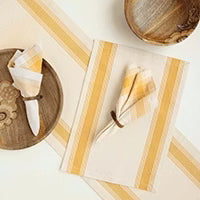


DIY Cutting boards
Shopping for too many kitchen accessories along with other home décor items might sure burn a hole in your wallet. But some accessories are just necessary, and you cannot get away with not having them. If you intend to spare your pockets some extra expense, but also need quirky cutting boards, here we are, to help you precisely out of this dilemma. The idea of making a DIY cutting board is probably toying in your mind for a while, but you don't know how to go about it. Fret not, because making cutting boards on your own is relatively simple and very little time-consuming.
The materials you need depend on the kind of board you want. Here are a few tips curated by Ellementry on how to go about making your wooden cutting board out of numerous DIY kitchen ideas.
Wooden Cutting Boards
Crafting with wood is likely to make you hesitant since it involves being precise in cutting and shaping wood and working efficiently with it. But if you make sure your wood is of premium quality and not warped or damaged, your board will be effortless to make and will last you a long time. There is no harm in using scrap or leftover wood. It will only be like turning something into beauty from ashes. You must also keep in mind that the base material is like the cornerstone on which the rest of the articles are added, and the structure is made secure, hence your base is essential.
The materials you need to assemble for this DIY adventure of yours are:
- A good quality wood board or strips of wood
- Waterproof glue of premium quality (in case you are using wooden strips)
- Some parchment paper or sandpaper with good grit quality
- Mineral oil of food-grade
- Rags to clean up your mess
Let's get started!
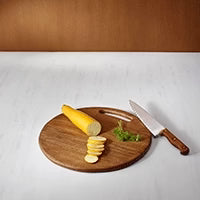
Firstly you need to make sure that the board you are using is of good quality wood. Since there will be a lot of cutting and knife marks, it is only vital that the board is good enough to endure all of those cuts.
Tip: To help you make a choice of wood, a little secret is that you should preferably select dense and hardwoods with a closed grain. These kinds are the best in retaining moisture and all the knife cuts. Some examples of such wood are walnut, maple, and cherry. Softwoods like pine and cedar would not be lasting longer and will wear out in no time.
The edge strip of wood is called the edge grain, and the width of the grain will define the thickness and size of your cutting board.
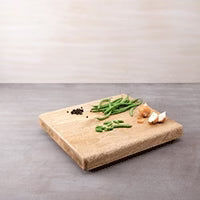
- Flatten out the board
You need to determine the size you would need according to your liking and then get the wooden slab cut accordingly. A standard size suggested would be an 8- inch slab, with the width and breadth of the edge grain being 2 inches and 4 inches respectively. Once you place down the board on an extremely flat surface, you may press down to check whether your slab stands perfectly still or rocks over. Ensure flattening it in case it already isn't, by eliminating small amounts of wood on both ends of the slab, until it sits on the flat surface without wobbling.
If you have thick strips of wood, you may also use them by joining them together. But for that, they must be all equal in length and all other measurements.
- Arrangement and Gluing
Mark all your pieces according to how you want to arrange them together so that you don't get your pieces jumbled up. Once you have arranged them per your wish, use a good quality waterproof glue to bind them all together. Ensure that you use a generous amount of glue and even allow it to ooze out a little. Some suggestions for good quality glue would be Titebond Glue, or even a Hot Glue gun would do. But since we need to make sure that your board endures everything, whether liquid or knife cut injuries to it, the best only is advisable for durability.
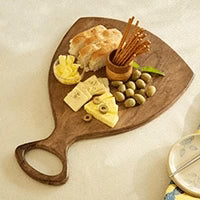
Tip: If you wish to have an even more handy board, you can cut out an inch wide small portion from one end of the board, about an inch away from the end. This will create a handle gap on the board to help you carry it around your kitchen easily.
- Perfecting the imperfections
If you find that there are holes or gaps on the board, you can use the same glue to fill them up and flatten it out. Very obviously, the board is not smooth yet. Here comes the sandpaper or parchment paper to your rescue. Rub the surface of the board with the sandpaper until it feels smooth enough to start working on it. Now you must also take care of your safety, and make sure you don't hurt yourself from the corners of the board. It would only be better if you also smoothen and round the edges of the board. You can rub the sharp edges until they round up, and become smooth for secure handling.
- Glassy shine
The last step to your DIY Cutting Board is using the mineral oil. Putting three thick layers of mineral oil would give your board a shiny glossy look. But you should make sure that the mineral oil you use is food grade since you don't want all the toxins getting in through the food you place on it. This last step gives your board the ultimate store-bought look while also retaining a very hand-made appeal to it.
Tip: To quirk up your board even more, and give it an extra personal touch, you can add your art design on to the board before layering it up with mineral oil. But again, ensure that you use only safe materials for it. Lastly, don't forget to clean up the mess created during this process of making your little masterpiece item. Making any good thing does require getting your hands and the things around you a bit dirty after all! That super cool wooden cutting board is now ready for your use, and the sense of pride you would feel, just looking at the board placed in your kitchen will surely be incredible!
 easy returns
 safe & secure
 hand crafted
